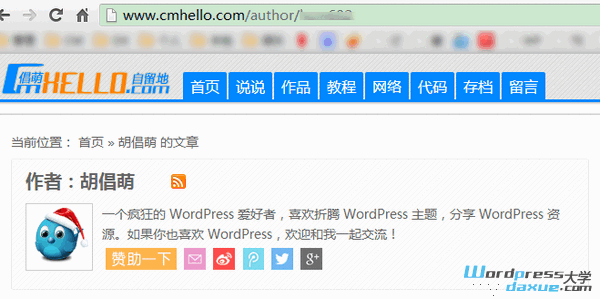
我们都知道,WordPress文章作者的存档页面地址都是类似 http://domain.com/author/cmhello 这样的,在用户名前面会添加“author”前缀。今天倡萌就分享下更改或者移除这个前缀的方法。
更改作者存档前缀 author
比如将 http://domain.com/author/cmhello 修改为 http://domain.com/profile/cmhello 样式,并且支持作者存档页面的Feed输出。
将下面的代码添加到当前主题的 functions.php 即可:
//更改作者存档前缀
add_action('init', 'wpdaxue_change_author_base');
function wpdaxue_change_author_base() {
global $wp_rewrite;
$author_slug = 'profile'; // 更改前缀为 profile
$wp_rewrite->author_base = $author_slug;
}
上面的代码就将前缀 author 更改为 profile 了,请根据自己的实际,修改第 5行的前缀。
参考资料:http://wp-snippet.com/snippets/change-the-author-slug-url-base/
注:如果添加代码后,访问新的存档地址出现 404 错误,请访问WP后台 >设置>固定链接,重新保存一次即可。下同。
移除作者存档前缀 author
将原来的 http://domain.com/author/cmhello 修改为 http://domain.com/cmhello ,并且支持作者存档页面的Feed输出。
//通过 author_rewrite_rules 钩子添加新的重写规则
add_filter('author_rewrite_rules', 'no_author_base_rewrite_rules');
function no_author_base_rewrite_rules($author_rewrite) {
global $wpdb;
$author_rewrite = array();
$authors = $wpdb->get_results("SELECT user_nicename AS nicename from $wpdb->users");
foreach($authors as $author) {
$author_rewrite["({$author->nicename})/(?:feed/)?(feed|rdf|rss|rss2|atom)/?$"] = 'index.php?author_name=$matches[1]&feed=$matches[2]';
$author_rewrite["({$author->nicename})/page/?([0-9]+)/?$"] = 'index.php?author_name=$matches[1]&paged=$matches[2]';
$author_rewrite["({$author->nicename})/?$"] = 'index.php?author_name=$matches[1]';
}
return $author_rewrite;
}
// 通过 author_link 钩子移除前缀 author
add_filter('author_link', 'no_author_base', 1000, 2);
function no_author_base($link, $author_id) {
$link_base = trailingslashit(get_option('home'));
$link = preg_replace("|^{$link_base}author/|", '', $link);
return $link_base . $link;
}
参考资料:http://wp-snippet.com/snippets/remove-author-prefix-from-slug/,原文方法不支持作者存档的feed输出,倡萌添加第 8 行代码,使之支持。

